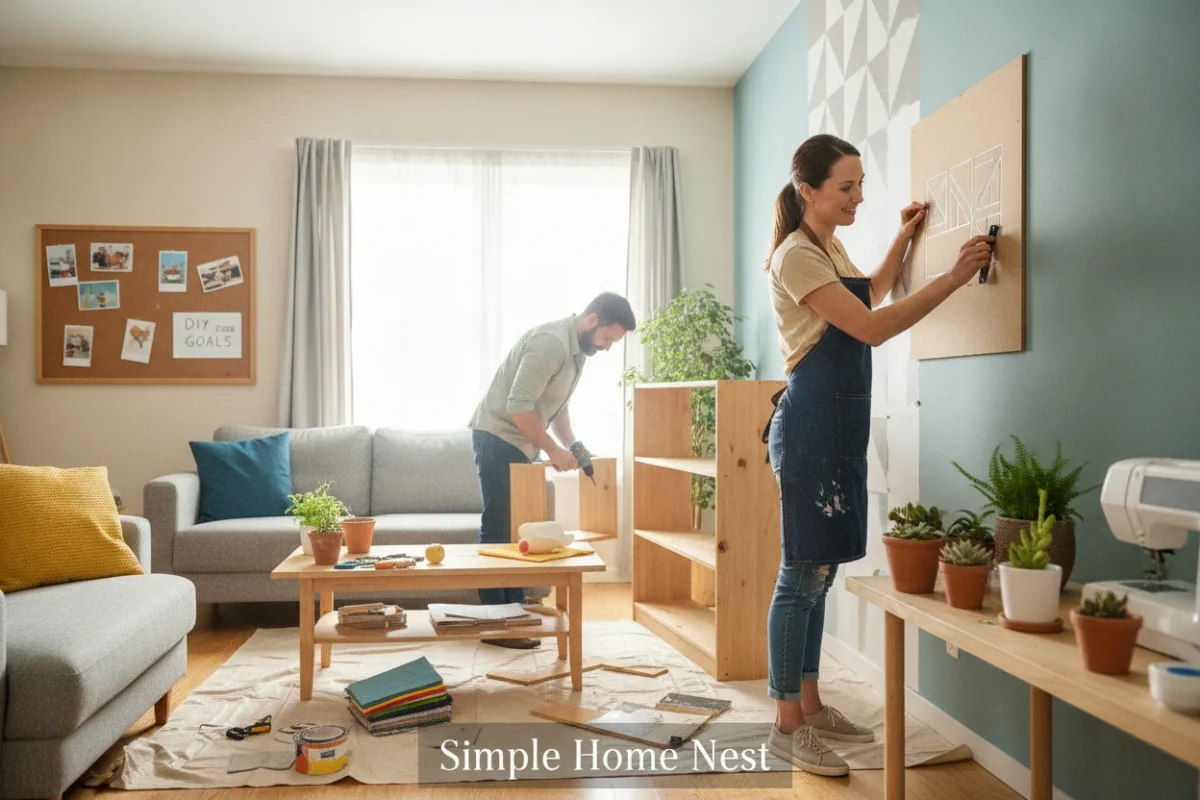
Are you tired of staring at the same outdated corners in your home but feel intimidated by complex renovations? You do not need a massive budget or advanced carpentry skills to transform your living space into a cozy, functional sanctuary.
By tackling a few strategic, beginner-friendly projects, you can elevate your interior design while building your DIY confidence. If you are ready to roll up your sleeves, here are Easy DIY Home Projects for Beginners: Simple Ideas to Improve Your Space that will make a massive impact today.
Update Cabinet Hardware for a Quick Refresh
Replacing outdated knobs and pulls is one of the easiest ways to modernize a kitchen, bathroom, or old dresser. It is a simple project that requires zero construction experience but completely changes the aesthetic of your cabinetry.
We often recommend this quick upgrade to renters and homeowners alike because it delivers immediate visual rewards. When exploring beginner-friendly DIY upgrades, hardware replacement stands out as the ultimate low-effort, high-impact task. You can easily find stylish, modern options online or at local home improvement centers.
To keep this project straightforward, you must measure your existing hardware accurately to avoid drilling new holes in your cabinet doors.
- Gather tools: Retrieve a manual screwdriver and a standard measuring tape before starting.
- Measure spacing: Calculate the center-to-center distance between the existing screw holes to ensure your new pulls fit perfectly.
- Remove old hardware: Unscrew the old knobs carefully to avoid scratching the wood or paint finish.
- Install new pieces: Align the new hardware with the existing holes and hand-tighten the screws securely.
Choosing the right finishes, like matte black or brushed brass, is a fantastic way to learn how to update a house on a budget. This quick weekend task proves that you do not need professional contractors to achieve a clean, modern aesthetic in your high-traffic rooms.
Create Budget Friendly Floating Shelves

Empty walls are wasted opportunities for both storage and style, especially in compact apartments or small bathrooms. Installing basic wooden floating shelves allows you to display beautiful indoor plants, books, or daily essentials while freeing up valuable floor space.
When planning your first DIY upgrades, floating shelves offer a perfect balance of utility and visual warmth. Mounting shelves correctly instantly makes a cramped room feel much larger. It is an excellent way to practice basic wall-mounting techniques safely.
To ensure your shelves can support weight without sagging, you must anchor them directly into the wall framework.

First, use a reliable magnetic or electronic stud finder to locate the wooden studs behind your drywall. Mark these locations clearly with a pencil, as screwing directly into studs provides the strongest possible foundation for your shelving brackets.
Next, place a physical bubble level against your shelf bracket before securing any screws to prevent slanted surfaces. If studs are unavailable in your desired spot, always utilize heavy-duty toggle bolts or drywall anchors designed for medium weight loads.
Apply a Fresh Coat of Paint to an Accent Wall
A single splash of color can completely redefine the mood of a bedroom, dining area, or home office space. Instead of committing to painting an entire room, focusing on a single focal wall saves both time and paint supplies.
Experimenting with bold paint colors is a staple of beginner DIY decorating. It teaches you the basics of surface preparation, brush control, and taping techniques without overwhelming your schedule. A well-chosen accent wall can highlight architectural features or create a beautiful backdrop for your favorite furniture pieces.
Choosing the right color and finish is essential for achieving a professional look that complements your existing home decor.
“An accent wall in a deep hue can actually make a small room feel deeper and more expansive by drawing the eye inward.” — Sarah Jenkins, Interior Design Consultant
Before opening your paint can, wash the wall surface with soapy water to remove dust, oils, and cobwebs. Apply premium painter’s tape along the baseboards, ceiling, and adjacent walls, pressing the edges down firmly with your fingers to prevent bleeding.
For most interior accent walls, an eggshell or satin finish provides a beautiful, low-sheen look that is easy to wipe clean. Once the paint is dry, peel the tape away at a forty-five-degree angle for crisp, professional lines.
Install Peel and Stick Backsplash Tiles

If you want a gorgeous tile look without dealing with messy mortar, heavy tile cutters, or wet grout, adhesive tiles are your best option. They are perfect for updating a kitchen backsplash, a wet bar, or a laundry room utility zone.
These lightweight, self-adhesive sheets are highly durable, water-resistant, and incredibly easy to clean with standard household sprays. Utilizing these sheets is one of the most popular beginner DIY projects because they are completely renter-friendly. They allow you to personalize your cooking environment without violating lease agreements or damaging the drywall.
To ensure a permanent, bubble-free bond, proper surface preparation is the most critical step of this installation process.
First, scrub the wall area thoroughly with a degreaser to remove cooking grease, splatters, and moisture residue. Measure the total square footage of your backsplash area and purchase ten percent extra tile material to cover any cutting mistakes.
Using a straight metal ruler and a sharp utility knife, cut the tile sheets to fit around electrical outlets and tight corners. Peel off the protective backing, align the sheet with your guide mark, and press firmly from the center outward to secure it.
Hang a Gallery Wall with Easy Alignment
Displaying a collection of family photos, travel postcards, or botanical prints is a wonderful way to inject personality into your living room. However, the fear of leaving dozens of accidental nail holes in the wall often holds people back from trying.
Creating a curated gallery wall is one of those classic simple home decor crafts for beginners that anyone can master. It represents one of the most creative beginner-friendly upgrades. With a clever planning trick, you can map out your entire layout perfectly before hammering a single nail.
To avoid unnecessary damage to your drywall, you should create simple paper templates of your picture frames first.
- Trace frames: Trace each picture frame onto standard butcher paper or newspaper and cut the shapes out.
- Tape templates: Use low-tack painter’s tape to arrange these paper templates on your wall until you find a balanced layout.
- Mark hook placements: Measure the distance from the top of each frame to its hanging bracket, and mark that exact spot on the paper.
- Secure hardware: Drive your nails or heavy-duty drywall hooks directly through the marked paper template, then tear the paper away.
If you are renting your apartment, consider using heavy-duty adhesive picture hanging strips instead of nails to keep your security deposit safe.
Build a Simple Wooden Planter Box
Building a custom wooden planter box is an excellent introduction to basic woodworking, requiring only minimal tools and materials. It is the perfect weekend activity to add green life to a sunny windowsill, kitchen counter, or outdoor patio railing.
This satisfying project teaches you how to measure, join wood, and apply protective finishes to protect raw timber from moisture. Adding a handmade planter box to your windowsill is one of the most rewarding beginner woodworking projects. It provides a beautiful home for fresh kitchen herbs, small succulents, or cascading indoor ivy plants.
To keep things simple, you can purchase pre-cut pine or cedar boards from your local hardware store to skip the sawing process.

Lay out your bottom board and four side panels, ensuring the edges align flush to create a clean rectangular box. Apply a generous bead of exterior-grade wood glue along the joints before securing them with small finishing nails or wood screws.
Once the glue dries completely, sand any rough edges with a medium-grit sanding block to prevent painful splinters. Finish the wood with a non-toxic clear sealant or a coat of outdoor acrylic paint to protect it from water spills.
Easy DIY Home Projects for Beginners Guide
Embarking on your first home improvement journey can feel overwhelming if you do not have a clear organizational plan. To guarantee success, you should start by auditing your current workspace and investing in a few versatile, high-quality tools. For more guidance on managing your living spaces, check out our comprehensive home organization guide to declutter your rooms first.
Planning is the foundation of every successful home improvement project. Before buying materials, establish a realistic budget, watch step-by-step video tutorials, and clear a dedicated, well-lit workspace.
Having the correct gear on hand prevents frustrating mid-project trips to the hardware store and ensures your personal safety.
| Tool Type | Essential Items Included | Average Cost Range | Primary DIY Applications |
|---|---|---|---|
| Basic Hand Tools | Hammer, screwdrivers, tape measure, utility knife, level | $20 – $50 | Hanging pictures, tightening furniture, minor adjustments |
| Entry-Level Power Tools | Cordless drill, driver bits, orbital sander, jigsaw | $45 – $120 | Drilling pilot holes, assembling furniture, sanding wood |
| Safety & Prep Gear | Safety goggles, dust masks, painter’s tape, work gloves | $15 – $30 | Protecting eyes/lungs, masking surfaces, handling lumber |
We highly recommend purchasing a reliable 12V or 18V cordless drill as your very first power tool investment. This versatile device makes driving screws, mounting heavy shelves, and assembling flat-pack furniture incredibly fast and effortless.
Upgrade Your Entryway with a DIY Coat Rack
An unorganized entryway quickly accumulates clutter, leaving coats, bags, and dog leashes scattered all over the floor or chairs. You can easily solve this daily frustration by building a beautiful, custom wooden coat rack tailored to your space.
Creating functional storage is a cornerstone of beginner DIY work. This project allows you to repurpose scrap timber while designing a highly practical organizing solution for your front door. It is also an excellent opportunity to experiment with wood stains to match your existing home decor.
Using a sturdy piece of oak, pine, or reclaimed pallet wood ensures your coat rack can handle heavy winter jackets.
First, sand your selected wood board thoroughly to remove any splinters, stains, or rough manufacturer stamps. Apply a thin coat of wood stain using a clean rag, or paint the board a solid color to match your walls.
Once dry, space out three to five decorative metal hooks evenly across the board, securing them with wood screws. Finally, mount the entire wooden assembly directly into your wall studs using heavy-duty construction screws for maximum weight support.
Apply Window Film for Privacy and Style
Standard glass front doors and bathroom windows often let in plenty of beautiful sunlight but sacrifice your home’s privacy. Installing decorative static-cling window film is a brilliant, non-permanent solution that diffuses light while blocking unwanted views from the street.
Applying window film is one of the most satisfying, stress-free beginner DIY projects. Since it uses static cling rather than sticky adhesives, you can easily peel it off, adjust it, or reuse it later. It is a fantastic option for renters who want to block out neighboring houses without installing heavy drapes.
To achieve a perfectly smooth, bubble-free application, you must use plenty of liquid lubricant during the installation process.

First, clean the window pane meticulously using a glass scraper and professional glass cleaner to remove tiny dust particles. Cut your window film to size, leaving an extra half-inch of material around the outer perimeter for trimming.
Generously spray the glass surface with a mixture of water and a few drops of mild baby shampoo. Apply the film to the wet glass, then use a plastic squeegee to push the water and air bubbles out to the edges. Trim the excess film with a fresh utility blade for a perfect, seamless fit.
Bring Your Home Improvement Vision to Life
Taking on small, manageable projects around your house is the absolute best way to build your practical skills and create a space you truly love. These Easy DIY Home Projects for Beginners: Simple Ideas to Improve Your Space prove that you do not need expensive professional help to make beautiful, lasting changes.
If you want to discover more budget-friendly design ideas, explore our curated list of beginner friendly bedroom makeover diys to transform your sleeping space. Grab your basic tools, pick your favorite weekend project, and start updating your cozy home today!
Frequently Asked Questions about Easy DIY Home Projects for Beginners: Simple Ideas to Improve Your Space
What is the easiest way to start with Easy DIY Home Projects for Beginners: Simple Ideas to Improve Your Space?
The easiest starting point is updating your cabinet hardware. This low-effort task requires no prior construction experience and instantly modernizes your kitchen or bathroom, making it the perfect gateway project to build your DIY confidence on a budget.
How do I replace cabinet knobs and pulls without drilling new holes?
To avoid drilling, you must use a measuring tape to calculate the precise center-to-center distance between your existing screw holes. Purchasing new hardware that matches these exact measurements allows you to simply unscrew the old pieces and install the new ones.
Are floating shelves practical for small apartments with limited floor space?
Yes, installing floating shelves is highly practical because it utilizes empty vertical wall space. This project frees up valuable floor space in cramped rooms while allowing you to display plants, books, or daily essentials, making the entire area feel much larger.
Why is finding a wall stud necessary when installing DIY wooden shelves?
Securing your shelves directly into wooden wall studs is essential to prevent them from sagging or falling. Drywall alone cannot support heavy weight, so using a stud finder ensures your floating shelves remain safely anchored and structurally sound over time.
Do I need expensive professional tools to complete these basic home upgrades?
No, you do not need expensive tools or professional contractors for these projects. Basic, affordable tools like a manual screwdriver, a standard measuring tape, and a simple stud finder are more than enough to achieve high-quality, modern results on a weekend budget.